The holidays this year was pretty good for me and I hope everyone else had a great time. I did get some more Gunpla for myself (darn you sales!) as well as Gunpla gifts from others. I'll be posting the pictures of my new items in my next post since I forgot to take them for this post. Anyways, here's my progress report:
RG Freedom WIP 2.5? Why the 0.5? Well, that's because I haven't progressed enough with it to justify calling it WIP 3. So what have I done with it? I got the 3rd party water slide decals, have placed some on the kit, and cleaned up some messy panel lines.
 |
| First decal piece ever. |
Since this is my first decal-ing, I can't say how well the 3rd party ones rate against the official Bandai ones. However, I haven't had any problems with them so far. The 3rd party decal was pretty much the decal-looking-stickers that came with Freedom in water slide form. The numbers correspond with each other and they look similar to each other. On the 3rd party decals, there are some white pieces with red in them while the original Bandai's are all white on the same pieces. On the flip side, the 3rd party's comes with extra decals not found in Bandai's originals, which are located in the lower right corner of the picture above. I've only done the shield and rifle so far, but I won't posting pictures of them until all of the decals are on.
I'm trying to decide on what type of top-coat I want to finish it with. Gloss or Matte? What do you think?
Moving on. As mentioned, I got the HG AGE-FX from my secret santa over at
/r/Gunpla. It's a great kit in my opinion. It has nice color separation and the inclusion of a stand is a plus. It has 7 runners including the polycap runner. Two of these are clear for the funnels and their stand.
 |
| HG AGE-FX |
 |
| 7 runners total |
 |
| Runner A |
 |
| Runner A with flash to show the different colors |
 |
| Runner B |
 |
| Runner C |
 |
| Runner D |
 |
| Runner E |
 |
| Runner F |
 |
| Bazooka piece |
The rifle's attachment piece that turns it into the Bazooka is as long as 5.5 inches. I'll be comparing the Bazooka itself and the built Gundam to show it's ridiculous size later.
 |
| Polycap |
The base that this kit comes with has two holes in its base. The front one is for the FX's stand and the rear one is for the funnels' stand. As you may have noticed, I don't have any pictures of the cut funnels because I was afraid of the pieces scratching each other while they are stored away until needed.
Mock Build:


Paint Time!
 |
| Primed with Mr. Surfacer 1200 |
 |
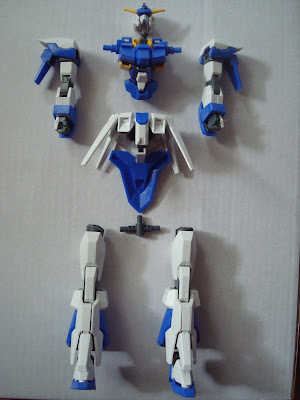
Some pre-shading on the edges of each face
100% Mr. Color Black (2) |
 |
| Done highlighting. 100% Mr. Color White (1) |
 |
| Primed with Tamiya Grey |
That's all for now. The FX has the slimmest waist I've seen on a Gundam yet. So it seems a bit out of proportion in the waist, but everything else looks great. If you attach the core fighter, it gives the illusion of having a thicker waist though.
I'm also wondering about how to paint that clear piece in it's waist, but keep it clear. I can just place a sticker on it like that manuals says, but I think painting it would look much better. For now, I'm thinking of painting the backside and the inner sides while leaving the outer sides in its original clear form. Hopefully, by doing so, the paint will show through when light hits it. The same idea will be applied to the core fighter's canopy.
Edit: Someone asked why I don't just use a mixture of clear paints and just paint the entire clear piece. I forgot to mention the reason why. I could have used a mixture of Clear + Clear Blue + Clear Green to get a color I wanted, but the usual store I go to, which also happens to be the only store that carries Mr. Color, ran out of Clear Green. Some local stores do sell Tamiya brand paints, but since I already have both Clear and Clear Blue by Mr. Color, I didn't want to spend 12+ dollars to get the three Tamiya paints I need.
Questions or comments are more than welcomed!
Thanks for reading!


No comments:
Post a Comment